Sunday, May 24, 2009

Finally... some progress and an update

Two weeks without an update! Wow, time to fix that.

Boat building progress yesterday... lately it seems I haven't made much "real" progress on my Goat Island Skiff. I guess that is because I've been sanding and fairing the rudder, and the progress is slow and marginal. Just how good is good enough, and why can I never seem to get there?

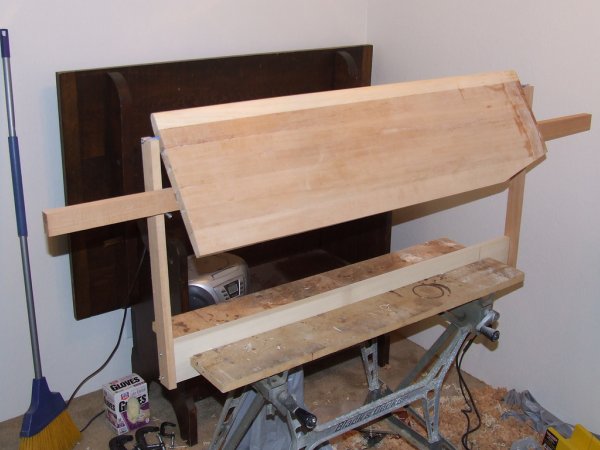
Yesterday I set the rudder aside (no, it is not done) so I could laminate the centerboard blank. The seven pieces of Western Red Cedar and two pieces of Ash fit together just like they did last month! After dry fitting things together to make sure they were in the right place and making sure the clamps were ready to go, I sat down to think my way through the process once again.

  • Turn the WRC staves on edge and clamp them together
  • Mix epoxy
  • Apply epoxy to edge of staves with roller; Apply epoxy to one edge of each ash stave
  • Turn clamped set of staves over
  • Apply epoxy to other edge of staves with roller
  • Mix thickened epoxy
  • Apply thickened epoxy to edge of WRC staves with roller; Apply thickened epoxy to one edge of each ash stave
  • Unclamp staves and turn on sides
  • Line up staves using reference line
  • Clamp staves together with three evenly spaced bar-clamps
  • Clamp cauls in place near ends of blank

Here is what the end result looks like:

Now I wait for the epoxy to set up.

In the meantime I am working on the #5 jack plane. A friend commented the other day on wondering about what hands had used his planes before him. I'm trying not to think about where this plane has been! It was filthy, layered with an oily, gritty, crusty combination of grime and rust. And that was before I took it apart! When I removed the frog I found a greasy/oily collection of sawdust, dirt, and something gritty (sand?). The Dremel scrubber brush has been useful. So has the Dremel wire brush, warm soapy water and an old toothbrush. Here is the plane in its current state:

It may be easier to replace the iron, but I will spend some time working on it tomorrow. And, of course, I will continue to clean the rest of the plane. I also need to get a larger piece of glass to use for flattening the sole. I'm also looking for a source for rolls of sandpaper - standard sheets are too short.

I will soon have another real boat part ready to go!

Sunday, May 10, 2009

Today's Creation

A number of people responded to my request for help figuring out a sail emblem for my GIS. Several people found other images and we had a bit of a discussion on the various "looks" and "feels."

Two images rose to the top of the pile, and I began modifying those two one little step at a time. What became the leading candidate, based on a rather bold pen-and-ink drawing of a ram, soon evolved into a "head shot," which looked pretty good on its own. However, when I put it on the sail (the magic of computers), it looked more like the Dodge Ram logo than it ever had before. Here is the image on the sail


While this could work, the boat would look like a billboard for Dodge.

I included what became the second candidate as almost a throw away idea. I didn't know how the image would look on a sail, and I had concerns that the relatively long horns would be fragile and not stay on the sail. But once I did the ram's head on the sail, I decided to try the silhouette on the sail...


This caught a bunch of people off-guard, but was universally liked (by those taking the time to respond).

For the time being I like this design well enough to use it on the boat. I still want to see what Sara comes up with.

A Diversion

While the sanding continues on the rudder, I needed a diversion. Something fun to hold my attention for a bit. Well, let's see if I can put this together so it makes sense...

I am, obviously, building a Goat Island Skiff, designed by Australian Michael Storer. So far, there is no class emblem or logo.

Earlier this week I saw this thread on Wooden Boat Forum. (Great looking boats by the way): Sandbaggers

While viewing the video and photo gallery I found these Bear and Bull sail logos/emblems. I really like the look of them:

There is some strong historical background and current usage for large insignias placed on the sails of small boats in Australia. It turns out that the Bear and Bull are on the east coast of the United States, and friends of mine in Texas have an owner's emblem. so it isn't strictly an Australian practice.

Since the GIS is Australian in origin and given the background and current usage, I though it would be fun to find something along these lines to use as a sail logo/emblem for the Goat. I've spent a fair amount of time looking for a suitable image. Lots of stuff out there, and this is what I've found that comes close to what I want:

This is the GIS insignia one of the guys put together. Sort of "cartoonish" and wouldn't work very well on a sail. Except...having said that, if just the head of the goat could be isolated, and maybe done in two colors or as a silhouette, it may be a possibility...


This goat head silhouette could possibly work, but I think the horns would have to be shorter... It would be a different look than the Bull or Bear, but it is something to think about.

A couple of thoughts... I like the look and style of the Bull and the Bear sail emblems. I don't want an evil image or connotation associated with the GIS. I'd like the image on the sail to be recognizable as a goat.

There is no immediate rush... I am a long way from needing a sail emblem. However, late last night on TSBB chat, I asked if there were any graphics type people - other than Laura - on the board. I couldn't very easily explain this whole process, particularly in a chat setting. So I posted what I'm trying to do (that post morphed a bit to become this blog entry), and got some enthusiastic participation from a pretty good number of people between last night and this afternoon. Through the usual trial and error, I created a sail emblem that will work. It looks good but it doesn not have the style or look of the Bear and Bull.

This whole thing began at work on Friday when I asked a co-worker if she could give the idea some thought to come up with something. If she comes up wiht something I like I'll have to figure out which one I like better!

I'll publish today's design separately just so it does not get lost at the bottom of this entry.

Saturday, May 9, 2009

Projects List

There are projects within projects.

My primary project - the "BIG ONE" - is, of course, building the Goat Island Skiff. Building a boat requires tools, time, skill and patience. I began this project with an assortment of hand and portable tools, lots of time, modest skills and plenty of patience (It seems that patience and time can make up for a lack of great skill.)

Since I didn't have all the tools I need or will need, I've had to purchase some (a block plane, Japanese saw, clamps... ) and will probably always be adding to my set of tools. Some tools or accessories are just easier to build themselves than to purchase, and thus become mini-projects themselves. This is my list of mini-projects I plan to build to help me finish the BIG ONE. Some of these I have commented on earlier, some are new additions, and I am sure others will be added as soon as I realize I need them.

    Mini-Projects
  • Sawhorses
  • Work Bench
  • Ladder Bench
  • Scarf Jig

Sawhorses: Sure, there are many ways to purchase sawhorses. There are ready made wood, metal, or plastic ones. There are any number of systems available to "just add legs" to assemble your own. But these are not terribly economical. In a thread on the Michael Storer Wooden Boat Plans - Wood Work Forum (MSDF) a gentleman building a GIS posted a link to these Wooden Sawhorses. As soon as I saw them I thought, "I need those, and I can build them!" So, the sawhorses are on the mini-projects list.

Work Bench: When I began building my boat I had my dining table and my WorkMate. I recognized the need for more space, more so in terms of table or counter top work surface than room space - at least for what I am doing now. I really didn't want to use the dining table. It isn't necessarily flat or truly square so it is not ideal as a wood-working surface. Oh yeah, I built that table more than 30 years ago and didn't really want to drip epoxy or tools on it... I found these plans for a Work Bench . This is a very basic design that can be built to really any size to fit my needs. While the Work Mate is serving admirably I can see the need for a larger work surface in the near future.

Ladder Bench: I'm not sure that is the correct name, but it does describe an accessory I will need to help with assembling the hull (when I get to that stage!). A ladder bench is simply a narrow (3', maybe) frame that sits across two sawhorses to support larger pieces or assemblies. It is a table without legs of its own or a top surface. It can support sheets of plywood for cutting or hold a hull at a comfortable working height. I don't have pictures to share right now, but I will add one when I find it.

Scarf Jig: This has been described in an earlier post but I include it here as it is a mini-project I need to complete before I can proceed with making the gunwales, inwales, and skids. The scarf jig is described in a Wooden Boat Forum thread, and detailed here:


I'll add to this list as need be, and I will describe building and using these items as I continue building my GIS.

Thursday, May 7, 2009

Lists, Lists, Lists... they never seem to end...

Having glassed the rudder on Sunday I have spent the last few evenings sanding. Lots of sanding is needed to eliminate the little flecks, bumps, and dimples that formed as the epoxy cured. I'm not sure if it is dust (plenty of that around here lately!) or what, but it does seem to sand out prettu easily. Another source of the flecks could be the small pink-napped roller I used to spread the epoxy. The nap wasn't long but I suspect it shed a bit as the epoxy rolled out. Sanding is one of those chores that just doesn't show up well in pics, so I won't bother with any right now.

Since I cannot sand all evening, I have been working on lists of things that need to get done, or can be done in a small space, things that will have to wait for a larger space, or that need to be done before I can work on boat components. Each list seems to get longer and the more I think about it the more lists I start. Today's new list is things I need to purchase (supplies and tools mostly). That may be an obvious list but I hadn't started it until today.

One benefit of all these lists is that I can "see" more clearly what needs to be done. I have the lists with me as I review the plans. As I figure something out (like a particular building sequence) I add it to the proper list. I won't include them all here, but here is the list of components I can build here in the apartment:

  • Rudder
  • Centerboard
  • Centerboard Case
  • Bulkheads (4 of them)
  • Transom
  • Tiller
  • Rudder Box

Over the next few days I'll describe the mini-projects I want to complete so I will be better prepared fo some of the upcoming building steps.

Sunday, May 3, 2009

The Rudder is Glassed!

While working out how to support the rudder during the glassing process, I was given some advice and suggestions on the Storer Design Forum. AJ posted pics of the U-frame he used for his rudder. Differing only in minor details (materials used) his frame is the same idea I've been working on. Nice to get some confirmation that not all my ideas are off the wall. One suggerstion AJ made was to let gravity work for you. A crossbar sitting on protruding nails (or screws) can support the rudder in a more horizontal position to make it easier to apply and spread the epoxy.

Gravity is a wonderful thing. But as with all good things it is possible for gravity to cause some mischief. True, one needs to misstep before gravity takes advantage, but it doesn't have to be a very big misstep...

No need to dwell on the negative...

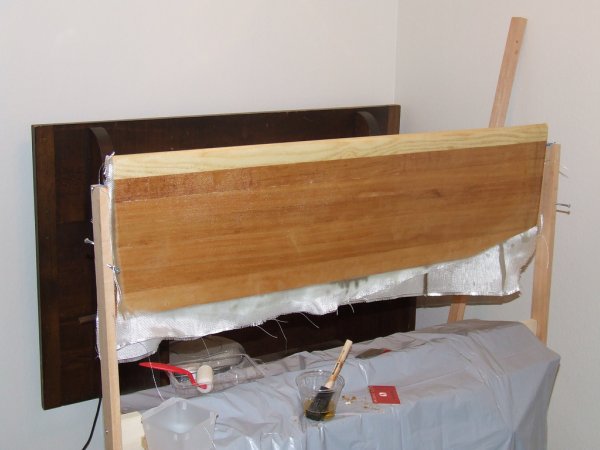
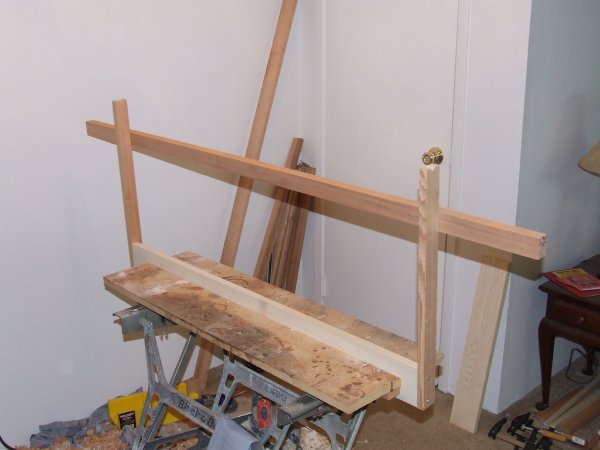
I set up the U-frame. Mine is a bit less robust than AJ's - I used a 1x 4 (he used what looked like a 4 x 8 - probably wasn't but it looked like it) cut an inch longer than the rudder and a couple of WRC cutoffs. I did use screws rather than nails because that's what was handy. The crossbar was a nice touch.

Here's the rudder all set to be glassed...

And, finally, here it is glassed...

There could have been a rather lengthy photo sequence between those last two pics. Let's just say I learned three things this afternoon.

Gravity is not always your friend.

Drop cloths are a good thing.

A basic law of physics,widely known as the jelly side down effect, applies to pots of Epoxy. (Clean up will be easier if I wait a bit...)

I'm thinking (hoping) the centerboard will be less of a struggle.

Saturday, May 2, 2009

Too clever for my own good...

Yes, it was an OOPS on Thursday. While I did do an excellent job of glassing the masking tape to the rudder (!), that wasn't exactly the intended result.

Friday evening's plan was to remove the tape with minimal damage to the rudder. Armed with a chisel, a Dremel equipped with a sanding drum, and a Mouse with coarse, medium and fine sandpaper, I spent Friday evening and a good part of this morning working on the rudder. Here are the results so far,


The rudder actually looks better than the picture. I think the camera zoom and flash brought out and accentuated the detail, making things look worse than they really are. (Interesting, wasn't I complaining about not getting enough detail in my photos just the other day?!? Guess I'm hard to please.) You can tell I did not apply enough resin to fill the weave of the cloth, but I guessed there would be a lot of sanding involved, and another coat of resin would have meant more sanding. Because there is still a distinct line where the the glass ends I will work on two things this afternoon. I will continue sanding to minimize the line and I will glass another strip of FG around the rudder, overlapping the line. I will not mask off any part of the rudder for this afternoon's work!

While that is setting up I will work on my U-frame idea so I can glass the rest of the rudder tomorrow.

Followers

About Me

My photo
I'm a woodworker, boat-builder, sailor, cook, baker and all-around good guy!